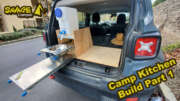
In Part 1 a 2’x3’ base of ¼” plywood became the foundation for the camp kitchen, and on the left hand (driver’s) side, we now have built out compartment containing a slide-out counter, a slide-out sink, a platform for a water jug to sit over the sink and some future storage for small camp stove.
Here in this Part 2 article, we’ll focus on the right (passenger) side of the camp kitchen where I build a slide-out tray to securely house a 12V fridge/freezer unit.
SUV Camp Kitchen Build Articles:
- Camp Kitchen Build Overview
- Part 1: Camp Kitchen Slide-out Sink and Countertop
- Part 2: DIY Slide-out 12V Fridge/Freezer (this article)
- Part 3: 12V Off-grid Power: Switch Panel, Battery & Solar Panel (Coming Soon)
- Part 4: DIY Camp Kitchen Finish Work (Coming Soon)
- Part 5: Field Test (Coming Soon)
Supplies Used in This Part 2 Build Article:
- Vadania 24” locking drawer sliders w/ bearings for the slide out countertop
- 1 ½” angle aluminum, 1/16” thick for countertop, sink & shelf mounts, and bracing (Home Depot)
- ¼” thick cabinetry plywood (Home Depot)
- A piece of puzzle floor mat for the underlayment of the fridge.
- Stainless steel fasteners (machine thread screws, washers, lock nuts) (Home Depot, Lowes)
- AlpiCool C15 (15 liter) 12/24 Volt Cooler / Freezer uses both AC/DC Power
Limited Solutions for a 12V Fridge Freezer Unit to fit the Camp Kitchen Build for the Jeep Renegade
Some things that made integration of a 12V fridge/freezer into the Savage Camper kitchen build very challenging were::
Rear Cargo Space
In order to retain the rear passenger seat’s ability of opening up, the length for a 12v cooler is limited to about 22”. In the Renegade, the rear seat folds down in two parts: ⅓ on the passenger side and ⅔ on the driver’s side. At the floor of the rear trunk storage space, you’re looking at a bit over 24” at floor level. With the seats sloping back at 70 degrees, that space steadily decreases as you rise from the floor to roughly 20+” at level with the top of the seat.
12V Fridge Cost
If you’ve ever taken a look at the major camping fridge/freezer units available around the size in this project, you’d know it’s not uncommon to see them in the $500+ price range. There is no way I could keep to a total budget of $1,000 for this project with a cooler unit costing this much.
12V Power Access
The rear 12V power socket in the Jeep Renegade is power on only when the Renegade is running. I did some research online as well as consulted a fellow Renegade owner, and found there’s a fuse update that can be done where it enables the rear 12V power socket to be on full time, even when the Renegade is not running or “on”. I actually filmed how to do this in a separate YouTube video, where I also updated my dying battery to a Renegade Optima 12V battery. If you’d like to learn more, you can watch the video below. Just note I’m not a professional auto mechanic, just and overland hobbyist learning while working on my Jeep Renegade and other vehicles.
The 12V Fridge/Freezer Solution for the Jeep Renegade & other Small SUV’s
I had found a few high end 12V fridge/freezer units that are about 24” in length, but I wouldn’t be able to do Savage Camper kitchen stealth mode (open the rear seats up which hides the camp kitchen) because I’d have to keep the ⅓ passenger side rear seat folded down. For this build I wanted to hide the camp kitchen from view, and that means the rear seat needs to open up without interference from a 12v fridge/freezer unit in its way. So even a fridge 24” in length if it were cheap wouldn’t work.
With some due-diligence research, I finally came across a budget-friendly 12/24V DC/AC fridge/freezer unit on Amazon for only $179 (at the time I purchased it). It’s called the AlpiCool C15 (15 liter) Fridge/freezer. It’s their smallest size unit at 22.4”L x 12.6”W x 10.2”H inches. Not only was the price great, the Alpicool C15 fell within my length limitations for space.
This compact, 12 Volt cooler comes with 2 cords, one for AC power and one for DC. When running on 12V DC, the cooler has 3 levels of battery protection mode, so you don’t accidentally drain your vehicle’s battery down if drawing power from there. There’s also an Eco mode for AC power. The LED display also has a USB port. The cooler will drop in temp down to -4F° as a freezer. There’s even bluetooth and an app that ties into the AlpiCool unit as well, but I have yet to try it.
As of this writing, I have been using the AlpiCool C15 cooler at home now for about 7 months full-time on AC power and it has worked superb with no issues, swapping it to the Renegade on 12 Volt DC power a number of times now for multiple trips.
Building the Camp Kitchen Slide-Out 12V Fridge Platform
For this slide-out platform, I used the exact same Vadania 24” locking bearing sliders that I used for the slide-out countertop (featured in the Part 1 Article & Video). They are heavy-duty and can easily support the weight of a full 12V cooler.
With 1 ½” angle aluminum, I mounted the Vadiania sliders to the floor of the camp kitchen cabinet taking shape from Part 1. To keep things as lightweight as possible, on other parts of the cabinet I’ve used 1/16” inch thick aluminum angle, but for these bracket mounts, I decided to go with ⅛” thick aluminum angle to beef things up for the weight of the cooler.
I created additional brackets w/ the 1/16” thick, 1 ½ inch angle aluminum to mount the 12V fridge platform base to, which was simply some ¼” thick plywood. I flipped yet another set of brackets made from the same size 1/16” aluminum angle on top of these, to provide a low side wall to box the fridge in on the sides to keep it from sliding around on its platform, but not extend high enough to interfere with the air inlets/outlets inside the fridge for the compressor to breathe and not overheat. This may all sound confusing in written format here, so you’d better idea visually in the full video for this article here:
To provide cushion for the 12V cooler in scenarios where the rear of the Renegade might be bouncing around alot off road, I trimmed one of the extra puzzle mat squares left over from the set I bought to provide a cushion under the entire camp kitchen unit as a whole. This piece of rubber matting cut out for the 12V fridge gives ample protection for the fridge in bumpy rides.
Finally, 1/16” angle was mounted in the rear with 2 holes drilled in it. In the front, I mounted some heavy duty, 90 degree stainless steel brackets with holes. I trimmed some small pieces of that same rubber matting to create a soft bumper mounted to the brackets, for the front of the 12V fridge to keep it sliding to the rear and bumping the rear cargo door. The holes in the front and rear brackets allow for a couple bungie cords to be strung over the 12V, firmly locking the Alpicool 12V fridge/freezer in place through bumpy terrain.
Stove Storage Compartment
I did jump back over to the driver side after all of this, and built a storage shelf that floats over the back of the slide-out counter where I plan to store the stove and other items. I also came up with a backing for the center compartment and storage area (no backing behind the fridge/freezer it just butts up against the back of the rear passenger seat.
In Part 3, I develop a basic on board 12V off-grid power system integrated into the camp kitchen, including a solar panel for recharging.